
BLine Paths
BLine is a path library with a field editor. You draw a path in the browser, export it into the robot project, and the library turns it into a command. This lesson replaces the Leave Start timer with a drawn path.
- The Leave Start routine from Autonomous, and the numbers it measured.
coroutine.await(...)and the OpMode lifecycle, from Coroutines and Autonomous.- A browser for the editor at bline.run.
A path is an ordered list of elements. A waypoint sets where the robot starts, translations are the points it drives through, and rotations set the way it faces on the way. An event trigger is a marker along the path that runs a piece of code when the robot passes it.
Install the library
- In VS Code, open the WPILib Vendor Dependencies view. Expand INSTALL FROM URL, paste the URL below, and press Install.
- Build the project. Gradle downloads the library from JitPack the first time, so the first build needs internet.
https://raw.githubusercontent.com/edanliahovetsky/BLine-Lib/wpilib-2027/BLine-Lib-2027.jsonThe editor at bline.run is version 1.0.0, the one that pairs with this library. Its home page links a Windows build.
Draw a path
The editor works on the src/main/deploy/autos folder: config.json, project.json, and one file per path under paths/. It ships to the robot with every deploy.
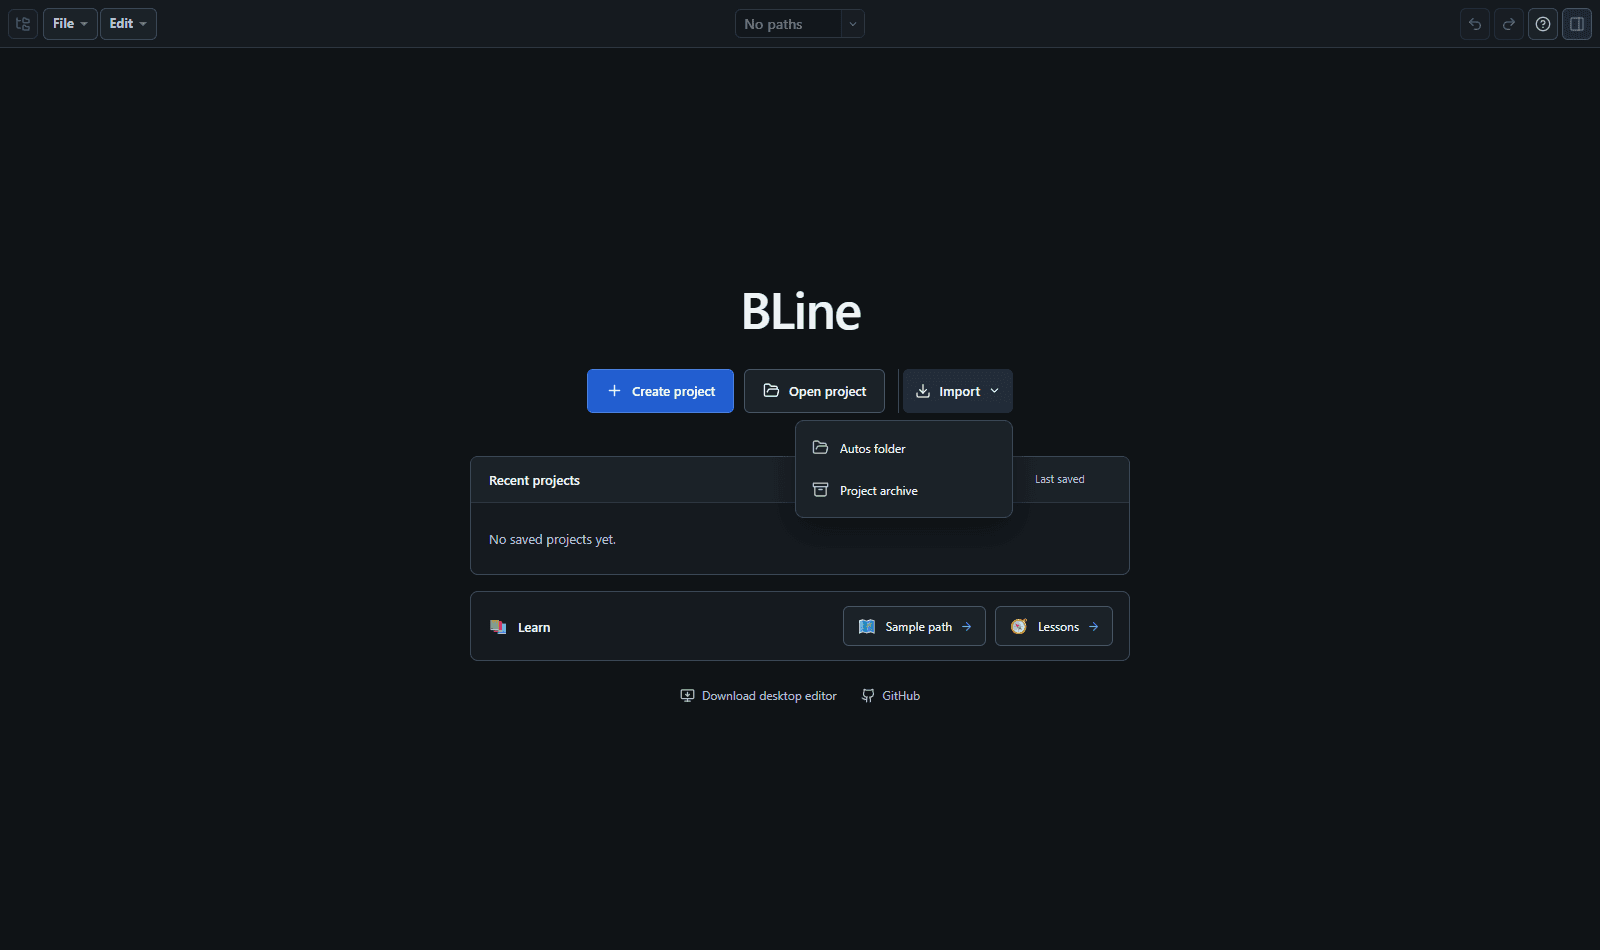
- On Home, open Import ▾, choose Autos folder, and pick
src/main/deploy/autos. With no folder yet, click Create project. - Choose File → New Path. Name it
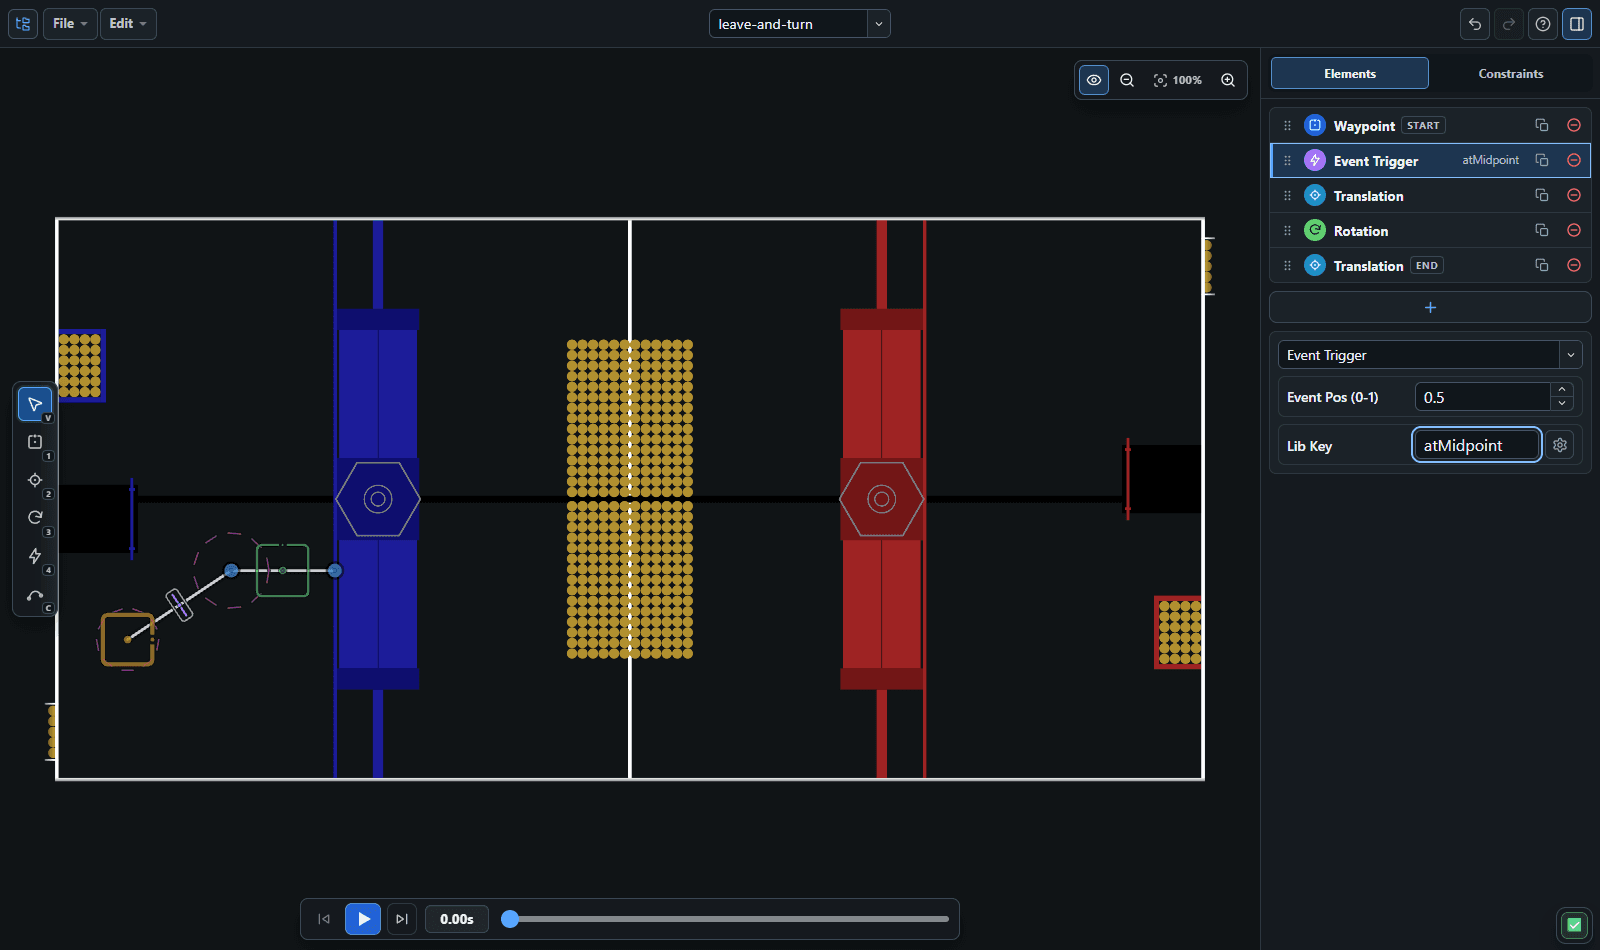
leave-startin the Project Navigator, press ✓, close the navigator, and pick the path in the path selector at the top. - With the Waypoint tool, key 1, click the start. Type X (m) 1.0 and Y (m) 2.0 in the inspector. With the Translation tool, key 2, click once for each next point. This path needs one, at 3.5 and 2.0.
- With the Rotation tool, key 3, click the segment. Set Rotation (deg) to 45 and Rotation Pos (0-1) to 0.8.
- With the Event tool, key 4, click the segment. Set Event Pos (0-1) to 0.5 and Lib Key to
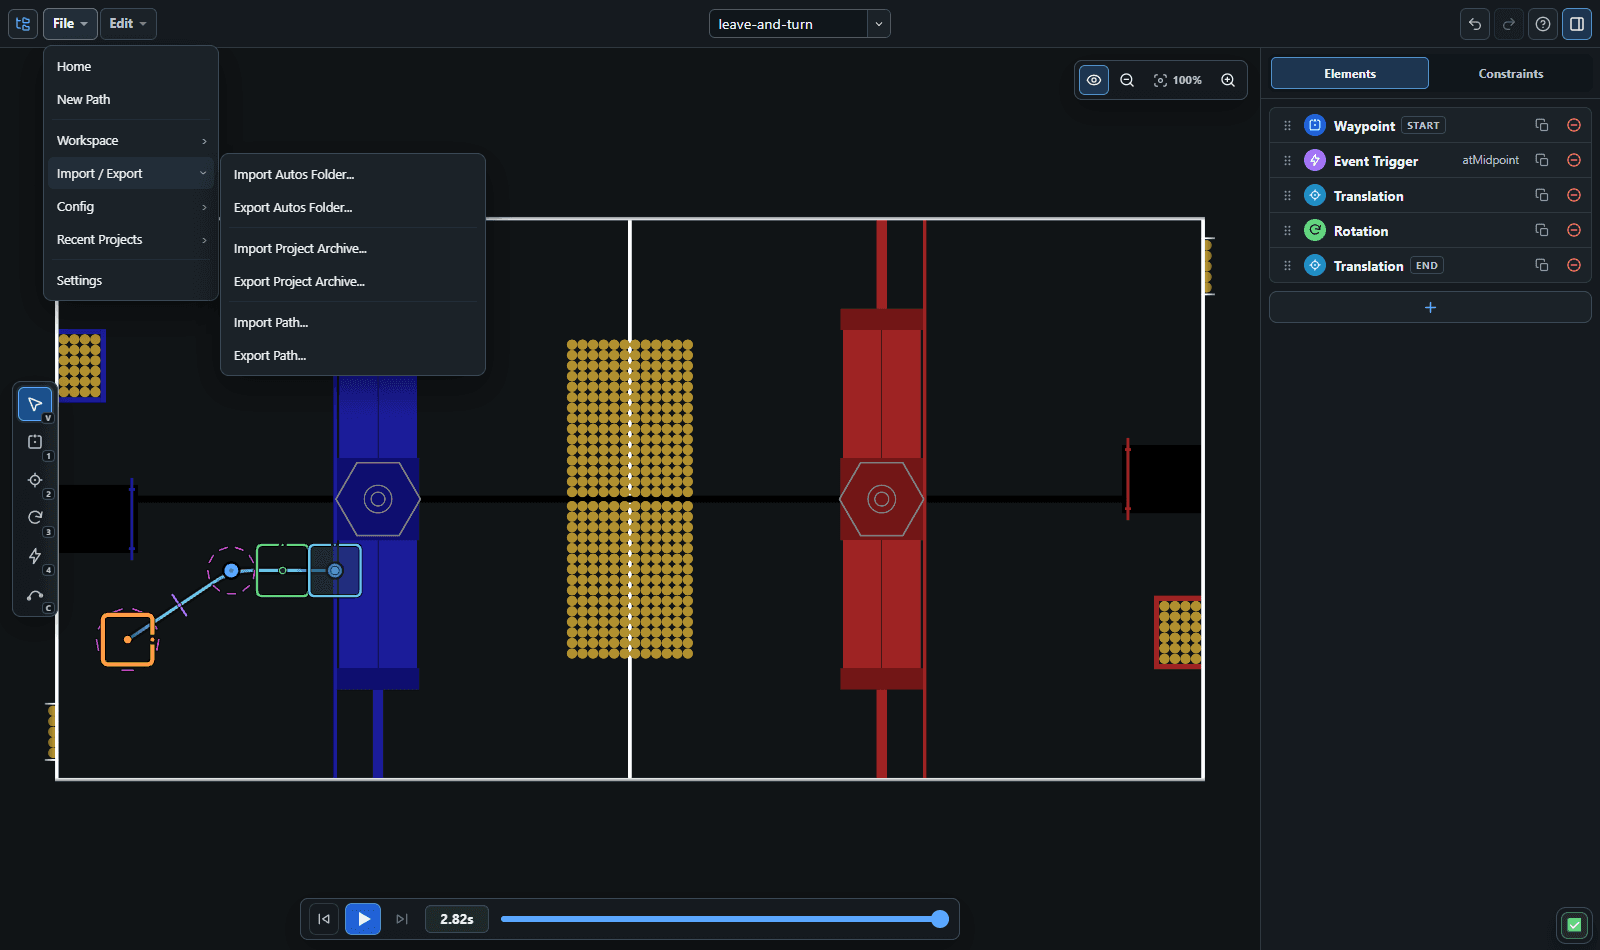
atMidpoint. - Press play to preview. Then choose File → Import / Export → Export Autos Folder... and put the
autosfolder insrc/main/deploy.
Speed limits sit on the Constraints tab. Each one reads Auto and follows config.json, which ships at 2 m/s and 2 m/s². To pin one, click its chip, switch it to Manual, type the value, and press Generate.
The builder in DriveMechanism
FollowPath.Builder is built once, in the DriveMechanism constructor, and turns every path file into a command.
// BLine hands back speeds relative to the robot, so the request is robot-relative too.// Velocity asks each wheel for an exact speed, so the small corrections at the end of a path// still turn the wheels instead of stalling against friction.private final SwerveRequest.ApplyRobotVelocity pathRequest = new SwerveRequest.ApplyRobotVelocity().withDriveRequestType(DriveRequestType.Velocity); // Teaches BLine how to drive this robot. After this, followPath can turn any path drawn in // the BLine editor into a command. pathBuilder = new FollowPath.Builder( DriveType.SWERVE, this, // path commands require this mechanism () -> getPose(), // where the robot is pose -> resetPose(pose), // used when a path says where the robot starts () -> getRobotVelocity(), // how fast it is moving, in its own directions velocities -> driveRobotRelative(velocities), // drive like this // Each controller pulls the robot back toward the path. TODO: tune on your robot. new PIDController(2.0, 0.0, 0.0), // distance to the target: m/s per meter // At 1.0 the turn lagged and stalled short of the end tolerance in simulation. new PIDController(3.0, 0.0, 0.0), // heading error: rad/s per radian new PIDController(0.2, 0.0, 0.0)) // drift off the line: m/s per meter // Paths are drawn from the blue side. On red, BLine turns them around the field center. .withDefaultShouldFlip();BLine reads and writes ChassisVelocities in the robot's own directions, with X as its forward, so driveRobotRelative feeds them to an ApplyRobotVelocity request. Velocity mode matters at the end of a path, where a small voltage can leave a wheel stuck against friction.
followPath(name) calls pathBuilder.build(new Path(name)), which reads deploy/autos/paths/<name>.json right there. The three gains are a starting point tuned in simulation only. If the robot stalls short of the end, raise them.
The Auto OpMode
Delete LeaveStartAuto.java. One @Autonomous class now runs every routine, and a drop-down on the dashboard picks which one.
@Autonomous(name = "Auto")public class AutoOpMode extends PeriodicOpMode { private final Selectable<Command> autoChooser = new Selectable<>(); private Command routine; public AutoOpMode(Robot robot) { // Event triggers are the markers along a path. The key in quotes must match the marker's key // in the BLine editor exactly. This one is a stand-in that only prints a line to the driver // station console and the log. A robot with an intake would start the intake here instead. FollowPath.registerEventTrigger( "atMidpoint", () -> DataLogManager.log("Leave Start: reached the midpoint")); // Read the path file now, so a misspelled name fails when this OpMode is picked. // withPoseReset puts odometry at the path's first point before it drives. final var leaveStartPath = robot.drivetrain.followPath("leave-start").withPoseReset(); // The routine owns no mechanism itself. The path command it awaits claims the drivetrain for // as long as it drives, and a second path would go on the next line. final Command leaveStart = Command.noRequirements( coroutine -> { coroutine.await(leaveStartPath); }) .named("Leave Start"); final Command none = Command.noRequirements(coroutine -> {}).named("None"); autoChooser.addDefault("Leave Start", leaveStart); autoChooser.add("None", none); Tunables.publish("Auto", autoChooser); } @Override public void start() { routine = autoChooser.getSelected(); Scheduler.getDefault().schedule(routine); } @Override public void end() { Scheduler.getDefault().cancel(routine); FollowPath.clearPendingEventTriggers(); } @Override public void close() { Tunables.remove("Auto"); }}The event trigger is registered first, before any path command is built. The routine is a coroutine that awaits the path, so a second path is one more line under the first: coroutine.await(nextPath);.
start() reads the drop-down, because someone can still change it after picking the mode. end() cancels the routine and clears any event the path passed but has not run yet. close() takes the drop-down off the dashboard when another OpMode is picked.
A path drawn ahead of time suits a fixed route. A target chosen at runtime is a field pose, handed to Drive to Point.
Check your work
- Run WPILib: Simulate Robot Code and pick Auto from the autonomous list.
Leave Startis already selected underTunables/Auto. - Enable and watch
Drivetrain/Poseon the 2D field in AdvantageScope. Disable and enable again, then tryNone, thenLeave Starton red.
You should see
- The pose jump to 1.0, 2.0 at enable, then the robot drive to within 3 cm of 3.5, 2.0, facing 45 degrees within 2. Positive angles turn counterclockwise.
Leave Start: reached the midpointonce per run in the console, a moment after the robot passes the marker.- A re-enable running the path again from the start, and a disable stopping the robot.
Noneholding still, and on red the path turned around the field center.
- A missing file
- The name in
followPathdoes not match a file inautos/paths,autos/config.jsonis missing, or an empty path threwPath has no destination. - A key mismatch
- Lib Key in the editor and the string in
registerEventTriggerdiffer. They must match letter for letter, capitals included. - No pose reset
- Without
withPoseReset(), odometry keeps whatever it read before, and the robot and the path disagree about where the path begins.
Check yourself
Which file does robot.drivetrain.followPath("leave-start") read?
The event never prints, but the robot drives the whole path. What is the likely cause?
Why does the path request use DriveRequestType.Velocity?
How do you make the Leave Start routine drive a second path after the first?
The robot drives the right shape but in the wrong place on the field. What is missing?
Why does AutoOpMode read the drop-down in start() and not in its constructor?